


Date: August 1942
Situation: Deutsches Afrika Korp's 21st Panzers Attacking Halfaya
Rules: Blitzkrieg Commander II {+50% movement/weapon ranges for 15mms}
Modifications: Added FOW dust cloud rules.
Suggestion: Click on images to make them larger.
-----
While General Pettygree and Muljadhi are in limbo in 1899, please view concluding photos of our Colonial BKCII activities of 30 March 2010. We return to Halfaya to the right side of The Pass where....

7th Armoured Division Crusaders have dashed into a maelstrom with DAK panzers. The ensuing combat went against 7th Armoured especially after....

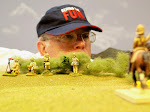
A pair of Stuka JU-87 dive bombers caused mischief. BKCII uses dice on the ground indicating hits. Four red dice reveal one hit per vehicle. No paperwork! "Saving Throws" can reduce some damage. (One red die formerly had two pips/hits showing.) Hits might cause suppression too. Hits could carry over (optional rule) or as we prefer, they are removed at the end of each Active Player Turn. Easy and fun.

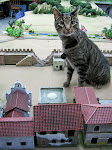
Meanwhile behind The Pass on the back table, panzers approached the village and supply dump. A forlorn hope of Marmon Herrington Armoured Cars attempted to put up dust clouds to discombobulate this DAK group. It failed to do anything significant especially since the Grant tanks that had been in reserve to use the cover of dust to attack were ineffectual in numbers and range.

Surviving Crusaders retreated to the left side of The Pass gaining the advantage of two more 2 Pdr. AT guns fortified there. The lone surviving Grant (of three) joined the group. This was a good defensive position which might have caused a lot of trouble to the foe but....


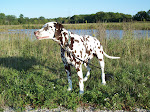
Surviving members of the DAK 21st Panzer Battlegroup consolidating on the ridge to the right of The Pass. The Pass is offscreen to the bottom. Well done Chuck L. and John B. commanding DAK forces!
--------------------
CLOSING REMARKS1. Game concluded 30 March 2010.
2. Try a table covering with almost anything underneath to simulate near real topography.
3. You can do it.
4. House Rule: Dust reduces the probability to hit in the open from 1D6 = 4-5-6 to 1D6 = 5-6.
5. 7th Armoured's battle plan was completely scrapped in Game Session #1 on 23 March because of DAK maneuver. The plan was to mass the nine Crusaders on the LEFT of Halfaya Pass hidden by a loooooong ridge. They would hide waiting for the Marmon Herrington Armoured Car Squadron (6 cars) to zoom out to create dust to cover their eventual advance. Once the dust was up, the Crusaders would dash forward en-masse at 37.5 cms per command throw, assisted by two Hurricanes, a captured and mobile Italian 20mm AA, one 2 Pdr. AT gun and an eight gun battery of off-table 25 pdrs. The hope was to utterly crush one end of the DAK force blitzkrieg style. All rubbish! The problem was...the foe had nobody there to attack.
6. The 21st Panzer Battlegroup massed all forces to attack the ridge to the RIGHT of The Pass. Their right rear flank was protected by a battery of two 88s, a mobile AA and three 37mm AT guns. Once my Armoured Cars realized this they withdrew. Clever DAK chaps, eh?
7. Hence all units above except the 2 Pdr. raced toward The Pass to engage the foe as seen in Între Acte {A and B}. I positioned four dug in 2 Pdrs. there to slow any DAK attack in a refused wing style. Slowing them with these did happen since they are very hard to knock out when dug in.
8. General Pettygree et al return before the end of April.
9. Comments welcome below.
----------